
Using FormBeep with WordPress#
FormBeep works with any WordPress form — whether you’re using popular form plugins like Contact Form 7, WPForms, Ninja Forms, and Forminator, or building custom forms with page builders like Elementor and Divi.
There are two ways to add FormBeep to WordPress:
| Method | Best For | Installation |
|---|---|---|
| WordPress Plugin ⭐ Recommended | Everyone | Download and upload |
| Embed Script | Advanced users or specific pages | Manual code insertion |
Method 1: WordPress Plugin (Recommended)#
The easiest way to add FormBeep to WordPress. No code required.
Step 1: Install the Plugin#
- Download the plugin (formbeep-instant-alerts.zip)
- Go to Plugins → Add New in your WordPress dashboard
- Click Upload Plugin at the top
- Click Choose File and select the downloaded zip file
- Click Install Now
- Click Activate
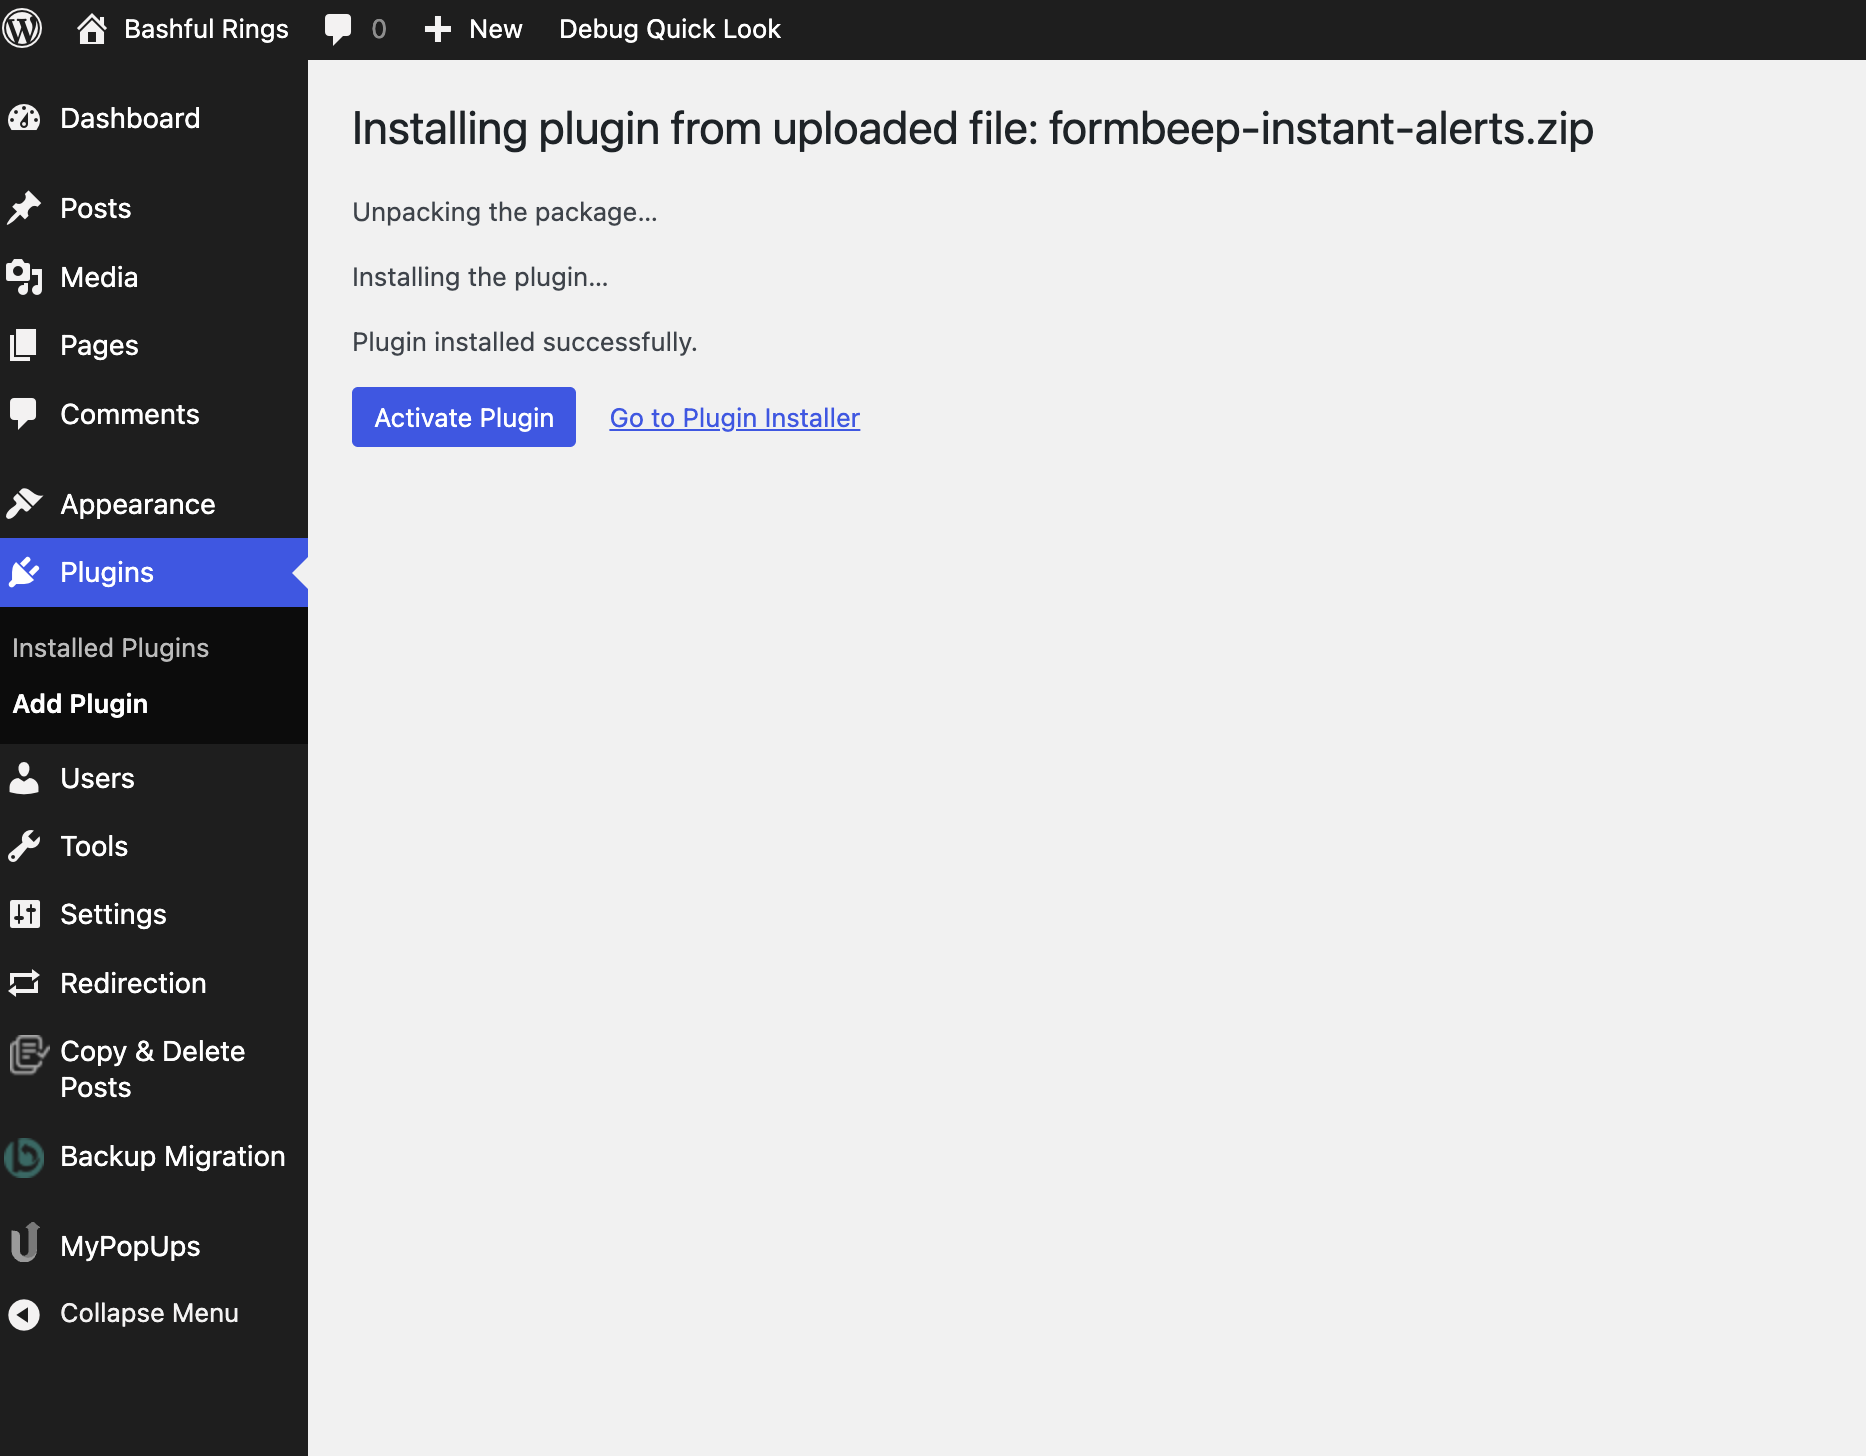 Uploading the FormBeep plugin to WordPress
Step 2: Add Your API Key#
- Go to Settings → FormBeep in your WordPress dashboard
- Paste your API key from the FormBeep Dashboard
- Click Save Settings
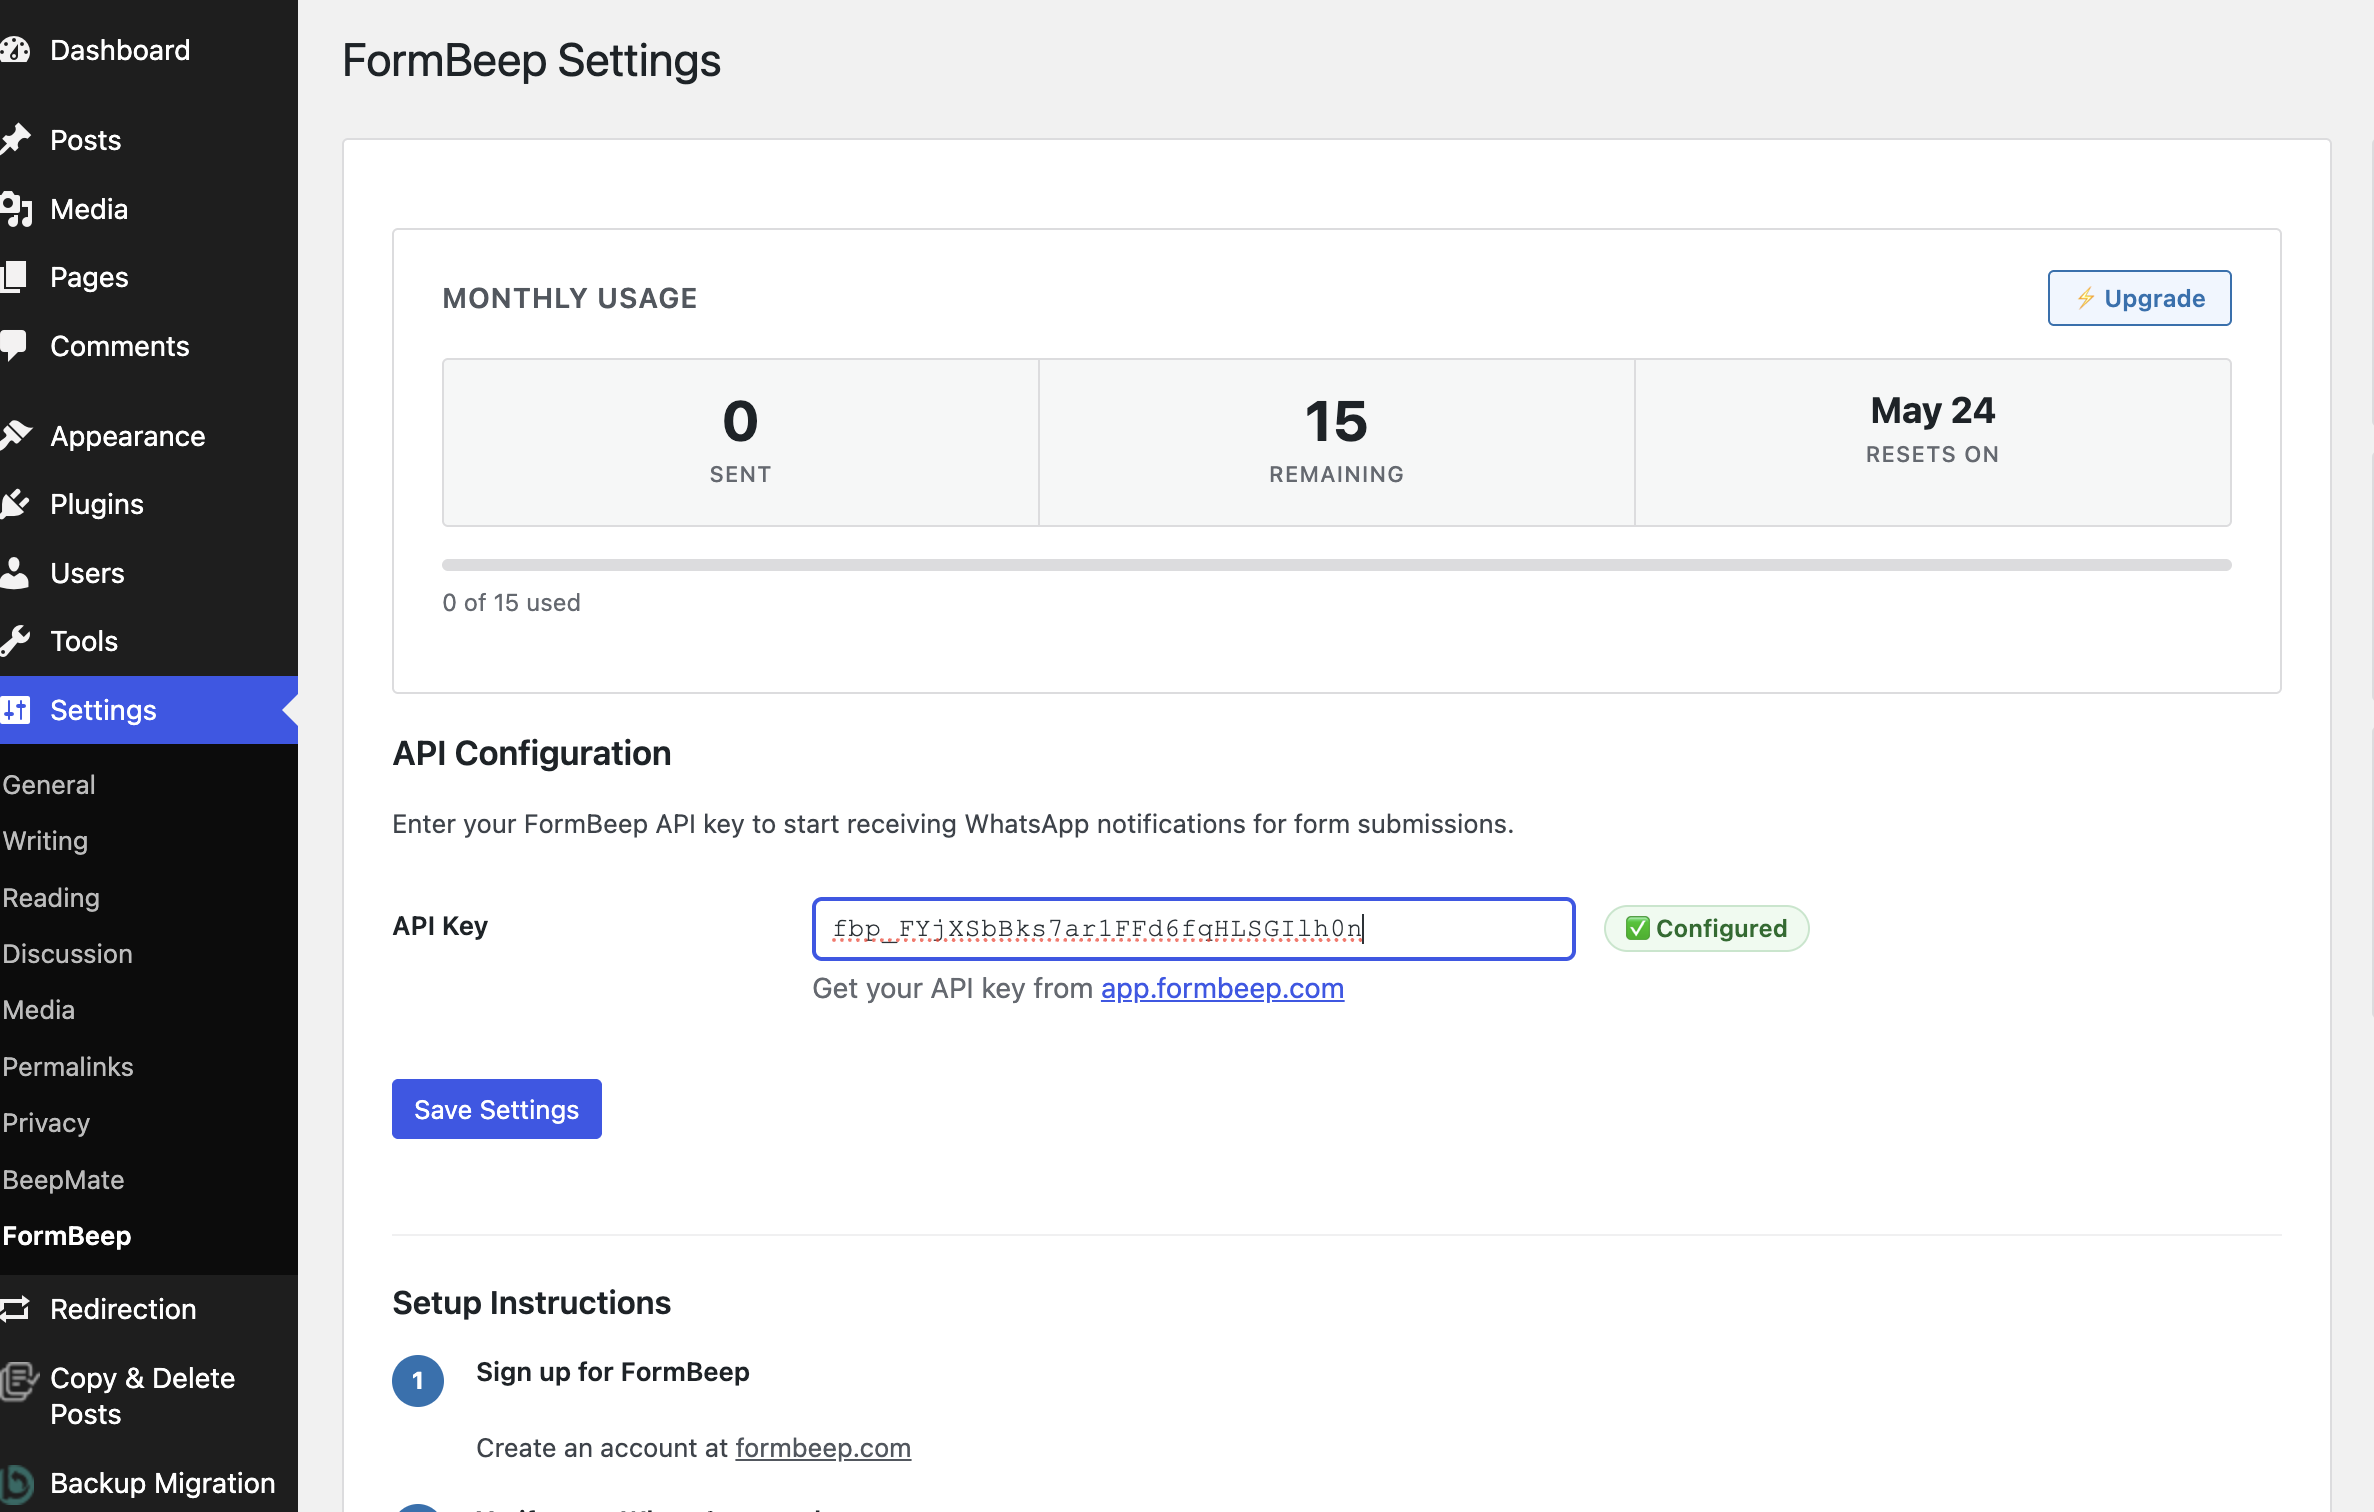 Enter your API key in the FormBeep settings
Step 3: Add Your WordPress Domain#
In the FormBeep Dashboard, go to Domains and add your WordPress site:
- ✔
example.com - ✔
shop.example.com(subdomain) - ✔
localhost(for testing)
Step 4: Test#
- Submit any form on your site
- Check WhatsApp for the notification
- Tap View Details to see the full form data
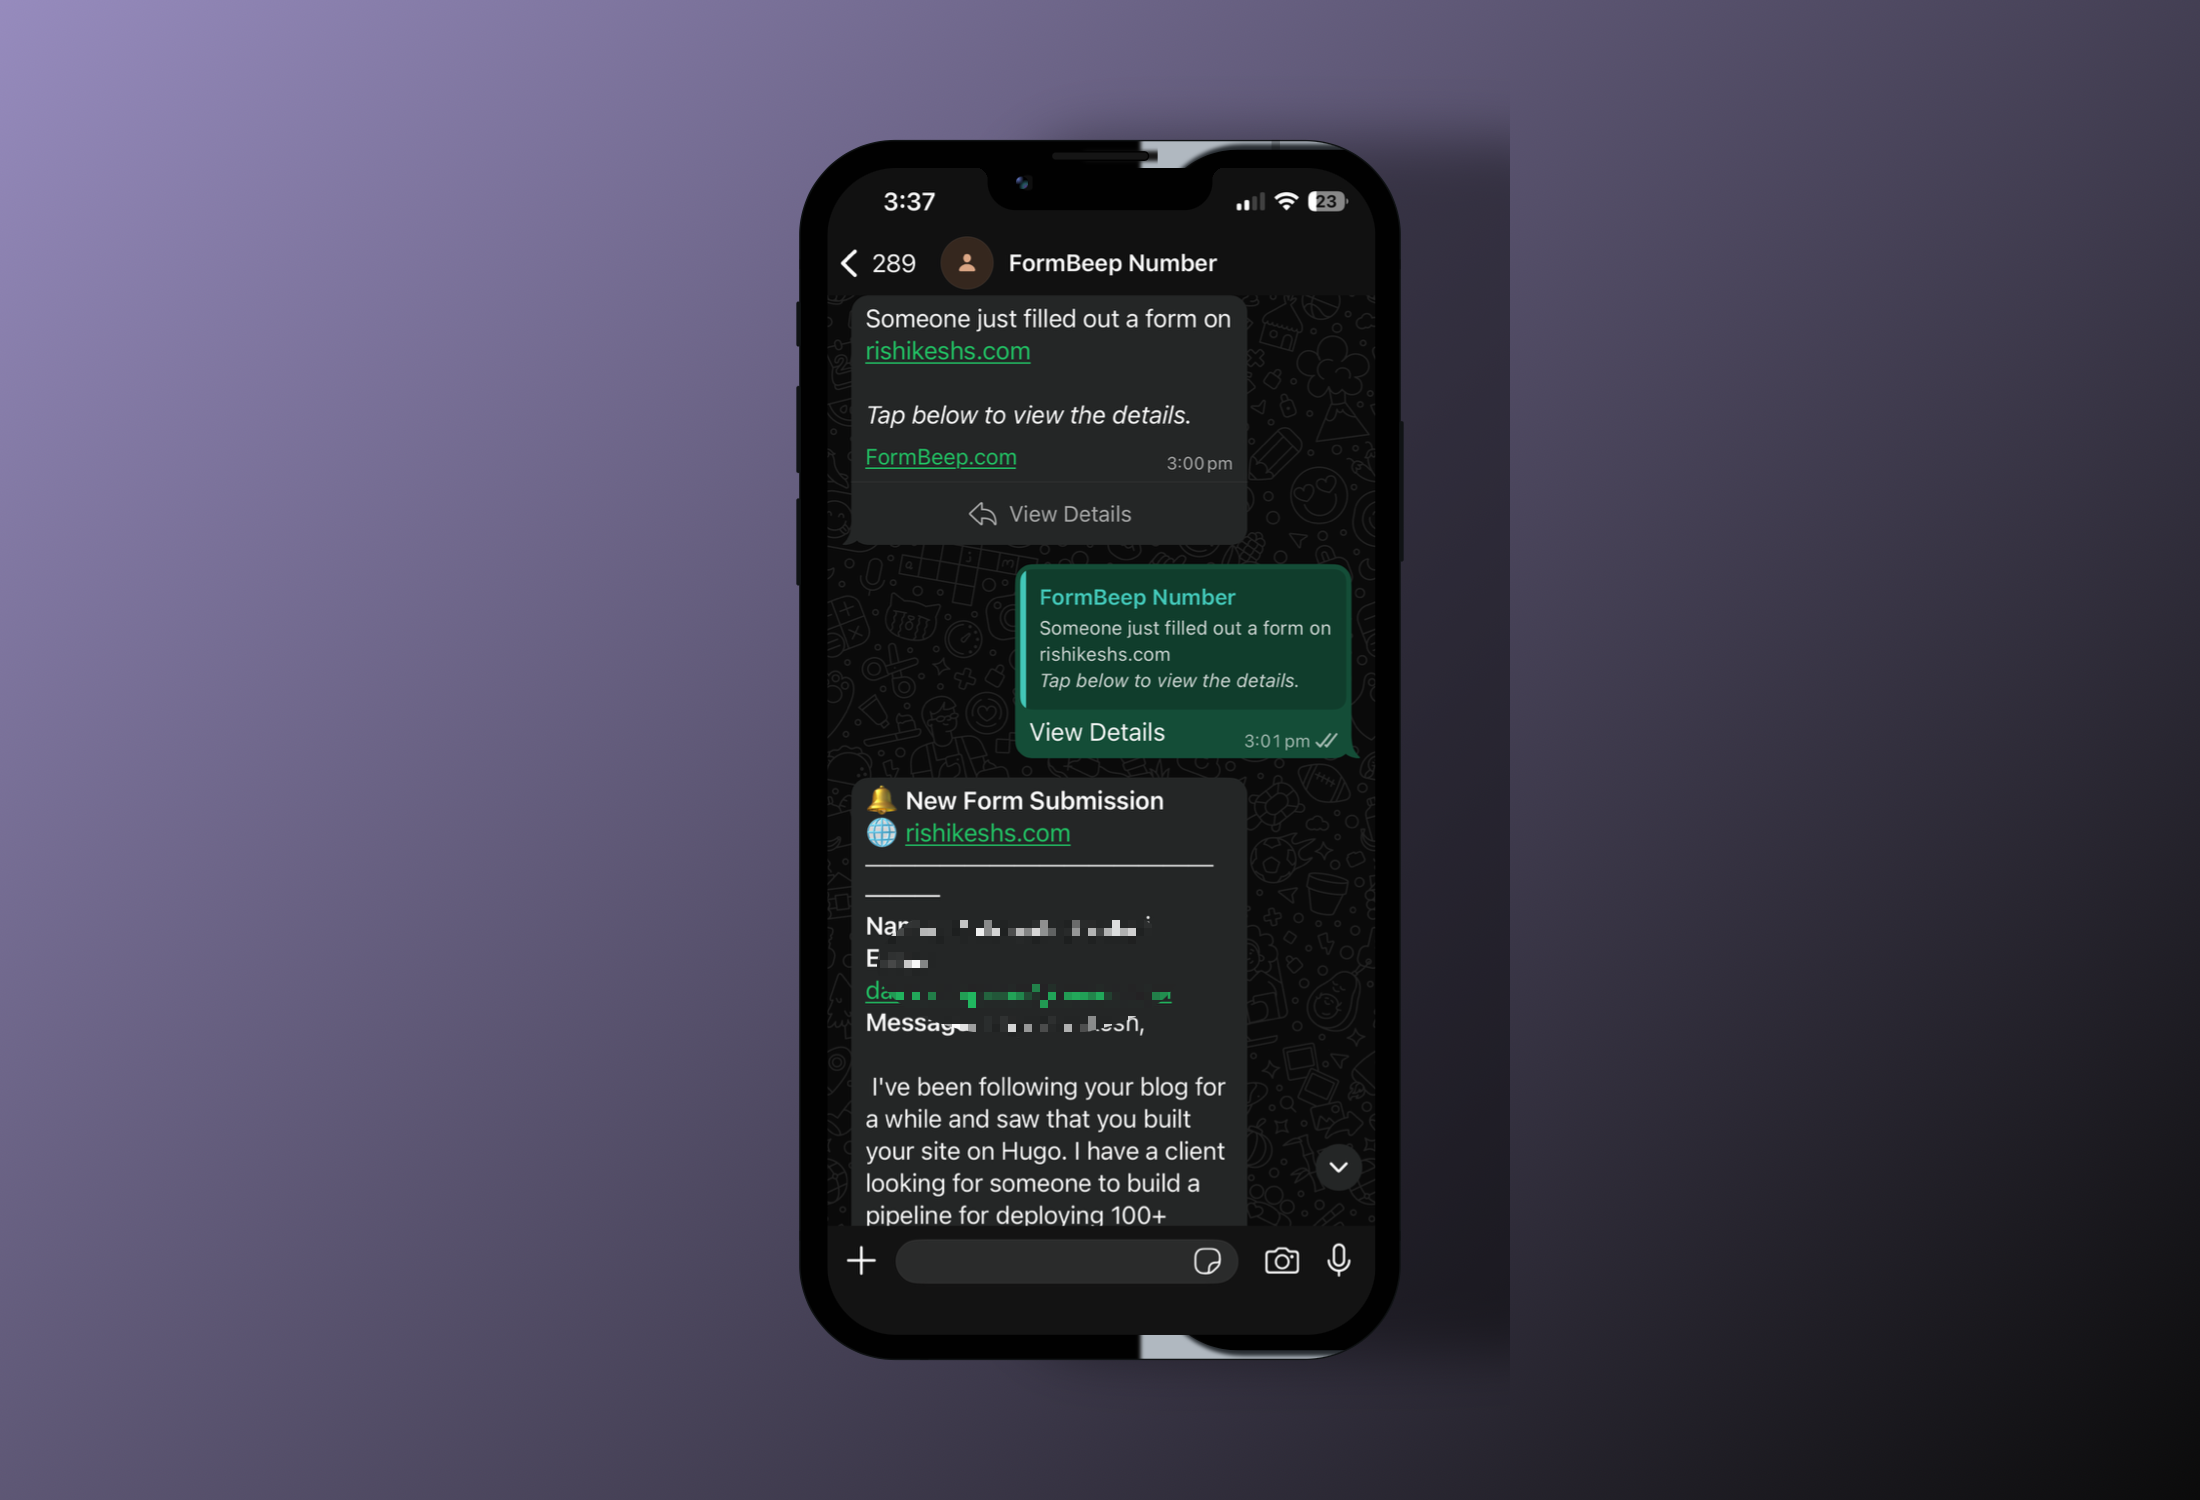 Instant WhatsApp notification when someone submits a form
That’s it! The plugin automatically works with all forms on your WordPress site:
- Contact Form 7
- WPForms
- Gravity Forms
- Ninja Forms
- Forminator
- Elementor Forms
- Divi Forms
- Gutenberg Forms
- Any custom HTML form
Method 2: Embed Script#
If you prefer manual installation or want to limit FormBeep to specific pages only, use the embed script method.
Quick Navigation for Embed Script#
- Setup
- Form Plugins: Contact Form 7 • WPForms • Spectra • Gravity Forms • Ninja Forms • Forminator
- Page Builders: Gutenberg • Elementor • Divi
- Site-Wide Installation (works on all pages)
- Testing
Step 1: Add Allowed Domain#
Before you start, add your WordPress site’s domain to FormBeep:
- Go to Allowed Domains in your FormBeep Dashboard
- Enter only the hostname of your site:
- ✔
example.com - ✔
shop.example.com(subdomain) - ✔
localhostor127.0.0.1(local testing)
- ✔
Important: Use hostname only. Don’t include https://, paths, or ports.
Using FormBeep with WordPress Form Plugins#
If you’re already using a WordPress form plugin, you don’t need to rebuild your forms. Just add the FormBeep script and it works automatically.
Contact Form 7#
Contact Form 7 is the most popular WordPress form plugin (5M+ active installs). FormBeep works automatically with any Contact Form 7 form.
Steps:
- Go to Pages in WordPress dashboard
- Edit the page with your Contact Form 7 shortcode (e.g.,
[contact-form-7 id="123"]) - Scroll to the bottom of the page
- Click + → Select “Custom HTML” block
- Paste the FormBeep script:
<script src="https://api.formbeep.com/v1/s/formbeep.js"
data-api-key="YOUR_API_KEY"></script>- Replace
YOUR_API_KEYwith your actual key from FormBeep dashboard - Click Update or Publish
Test it:
- Visit your contact page
- Fill out the Contact Form 7 form
- Submit the form
- Check WhatsApp for the notification
FormBeep automatically detects Contact Form 7 submissions and sends them to WhatsApp without interfering with CF7’s email notifications or redirects.
WPForms#
WPForms is a beginner-friendly drag-and-drop form builder (6M+ active installs). FormBeep works with both the free Lite and paid Pro versions.
Steps:
- Go to Pages in WordPress dashboard
- Edit the page with your WPForms form (shortcode or block)
- Scroll to the bottom of the page
- Click + → Select “Custom HTML” block
- Paste the FormBeep script:
<script src="https://api.formbeep.com/v1/s/formbeep.js"
data-api-key="YOUR_API_KEY"></script>- Replace
YOUR_API_KEYwith your actual key from FormBeep dashboard - Click Update or Publish
Test it:
- Visit your contact page
- Fill out the WPForms form
- Submit the form
- Check WhatsApp for the notification
FormBeep works alongside WPForms’ built-in email notifications and confirmations. Your form continues to work exactly as before.
Spectra (Ultimate Addons for Gutenberg)#
If your WordPress site already has Spectra forms, FormBeep works with them automatically.
Steps:
- Go to Pages in WordPress dashboard
- Edit the page with your Spectra contact form
- Scroll to the bottom (below your Spectra form blocks)
- Click + → Select “Custom HTML” block
- Paste the FormBeep script:
<script src="https://api.formbeep.com/v1/s/formbeep.js"
data-api-key="YOUR_API_KEY"></script>- Replace
YOUR_API_KEYwith your actual key from FormBeep dashboard - Click Update or Publish
Test it:
- Visit your contact page
- Fill out the Spectra form with test data
- Submit the form
- Check WhatsApp for the notification
FormBeep runs silently in the background. Your Spectra form continues to work exactly as before — visitors see no difference.
Gravity Forms#
Gravity Forms is a premium WordPress form plugin popular with agencies and businesses. FormBeep works with all Gravity Forms features including conditional logic and multi-page forms.
Steps:
- Go to Pages in WordPress dashboard
- Edit the page with your Gravity Forms form (shortcode or block)
- Scroll to the bottom of the page
- Click + → Select “Custom HTML” block
- Paste the FormBeep script:
<script src="https://api.formbeep.com/v1/s/formbeep.js"
data-api-key="YOUR_API_KEY"></script>- Replace
YOUR_API_KEYwith your actual key from FormBeep dashboard - Click Update or Publish
Test it:
- Visit your contact page
- Fill out the Gravity Forms form
- Submit the form
- Check WhatsApp for the notification
FormBeep works alongside Gravity Forms’ confirmations, notifications, and integrations. Your form continues to work exactly as configured.
Ninja Forms#
Ninja Forms is a popular drag-and-drop form builder (1M+ active installs). FormBeep works automatically with Ninja Forms — no configuration needed.
Steps:
- Go to Pages in WordPress dashboard
- Edit the page with your Ninja Forms form (shortcode or block)
- Scroll to the bottom of the page
- Click + → Select “Custom HTML” block
- Paste the FormBeep script:
<script src="https://api.formbeep.com/v1/s/formbeep.js"
data-api-key="YOUR_API_KEY"></script>- Replace
YOUR_API_KEYwith your actual key from FormBeep dashboard - Click Update or Publish
Test it:
- Visit your contact page
- Fill out the Ninja Forms form
- Submit the form
- Check WhatsApp for the notification
FormBeep automatically detects Ninja Forms submissions and works alongside its built-in notifications and confirmations.
Forminator#
Forminator is WPMU DEV’s form builder with advanced features. FormBeep works automatically with all Forminator form types.
Steps:
- Go to Pages in WordPress dashboard
- Edit the page with your Forminator form
- Scroll to the bottom of the page
- Click + → Select “Custom HTML” block
- Paste the FormBeep script:
<script src="https://api.formbeep.com/v1/s/formbeep.js"
data-api-key="YOUR_API_KEY"></script>- Replace
YOUR_API_KEYwith your actual key from FormBeep dashboard - Click Update or Publish
Test it:
- Visit your contact page
- Fill out the Forminator form
- Submit the form
- Check WhatsApp for the notification
FormBeep works alongside Forminator’s email notifications and integrations without any interference.
Building Custom Forms with Page Builders#
If you want to create a custom HTML form (instead of using a form plugin), you can use these page builders:
Gutenberg (Block Editor)#
- Edit the page where you want the form
- Click + to add a block
- Select “Custom HTML”
- Paste your form + FormBeep script:
<form id="contact-form">
  <input name="name" placeholder="Your name" required>
  <input name="email" type="email" placeholder="you@example.com" required>
  <textarea name="message" placeholder="Message" required></textarea>
  <button type="submit">Send</button>
</form>

<script src="https://api.formbeep.com/v1/s/formbeep.js"
data-api-key="YOUR_API_KEY"></script>- Replace
YOUR_API_KEYand publish
Elementor#
- Open your page in Elementor
- Drag the HTML widget onto the page
- Paste the full form + script (see Gutenberg example above)
- Click Update
Divi#
- Edit your page with Divi
- Add a Code Module
- Paste the full form + script (see Gutenberg example above)
- Save and publish
Site-Wide Installation (All Pages)#
If you have forms on multiple pages or want FormBeep to work site-wide without editing individual pages, add the script to your theme globally.
Method 1: Using a Plugin (Recommended)#
Why this method? Safer than editing theme files — won’t break when you update your theme.
-
Install the free “Insert Headers and Footers” plugin:
- Go to Plugins → Add New
- Search for “Insert Headers and Footers” by WPBeginner
- Click Install Now → Activate
-
Add FormBeep script:
- Go to Settings → Insert Headers and Footers
- Scroll to “Scripts in Footer” section
- Paste the FormBeep script:
<script src="https://api.formbeep.com/v1/s/formbeep.js"
data-api-key="YOUR_API_KEY"></script>- Replace
YOUR_API_KEYwith your actual key - Click Save
Done! FormBeep now works on every page of your WordPress site.
Method 2: Edit Theme Files (Advanced)#
⚠️ Warning: This method requires editing theme files. Your changes will be lost if you update your theme. Use a child theme or Method 1 instead.
- Go to Appearance → Theme File Editor
- WordPress will show a warning — click “I understand”
- On the right sidebar, find and click “Theme Footer” (
footer.php) - Scroll to the bottom and find
</body> - Add the FormBeep script just before
</body>:
<script src="https://api.formbeep.com/v1/s/formbeep.js"
        data-api-key="YOUR_API_KEY"></script>
</body>- Replace
YOUR_API_KEYwith your actual key - Click Update File
Note: If you’re using a child theme, edit the child theme’s footer.php. If footer.php doesn’t exist in your child theme, copy it from the parent theme first.
Testing Your Form#
Always test on the published page URL (not in preview mode).
- Open the page on your live site
- Submit a test message with real data
- Check WhatsApp for the instant notification
- Tap “View Details” to see the full form data
Troubleshooting:
- “Domain not allowed” error? Make sure the URL in your browser matches exactly what you added in Allowed Domains (without
https://) - Not receiving notifications? Check that you added your WhatsApp number during FormBeep onboarding
- Form not submitting? FormBeep runs in the background and never blocks form submissions — if the form itself isn’t working, it’s a separate WordPress/plugin issue
Advanced: Excluding Specific Fields#
Want to exclude captcha fields, tracking parameters, or other technical fields from your WhatsApp notifications?
See Exclude Specific Fields in the Customization guide.
Need help? Reach out at hello@formbeep.com or message @rishikeshs on Discord.